Allow me to introduce you to:
 10-13-2007, 09:25 PM
#51
Junior Member
Posts like a Ricer Type-R
Thread Starter

 braces? Are they magical or something?
No, I have a better idea.

Kindof a combination of the 2k hockey puck mount and what I did, plus a little of what I gave Paul for his.

 10-15-2007, 10:56 AM
#52
Junior Member
Posts like a Ricer Type-R
Thread Starter
*UPDATE*
We broke it. Upper steel strap is GONE. Assuming we lost it to and from dinner or a beer run.

Quite the accomplishment. Back to the drawing board, we now have a firm path forward that will work.
(I'll blame Paul)
We broke it. Upper steel strap is GONE. Assuming we lost it to and from dinner or a beer run.
Quite the accomplishment. Back to the drawing board, we now have a firm path forward that will work.
(I'll blame Paul)
10-15-2007, 11:07 AM
#53
DINOSAURUS BOOSTUS


Expert Gearhead

Can I suggest something if you have a 95-99 mount with the rubber still intact? Start with what I did and then improve it when you see how it flexes
I have found that most of the load is held on mine by the bolt I used after changing mine. We are both past the stock mount HP and while I know my mount isn't quite as far as you'd like to go, it may be a good starting point.
The only flex i see now is the subframe bolt locations.
I have found that most of the load is held on mine by the bolt I used after changing mine. We are both past the stock mount HP and while I know my mount isn't quite as far as you'd like to go, it may be a good starting point.
The only flex i see now is the subframe bolt locations.
10-15-2007, 11:10 AM
#55
Junior Member

Join Date: Jun 2002
Posts: 0
Likes: 0
Received 0 Likes
on
0 Posts

We knew from the cracking and extreme stress caused by the movement that it wasn't going to last long.
Bill gave me the keys and I probably finished it off.
I can't believe how much more power this car has now with the larger pulley on. It has to be commanding more timing now that the PCM has finally learned.
Bill has the shift modulator turned up to full shifting bang and screech mode. The torque steer is wild.
 It'* so funny how Bill likes to play with that auto opening exhaust cut out whenever we pull up to a Ricer, or go thru an echoing tunnel. It'* an attention getter.
Bill gave me the keys and I probably finished it off.
I can't believe how much more power this car has now with the larger pulley on. It has to be commanding more timing now that the PCM has finally learned.
Bill has the shift modulator turned up to full shifting bang and screech mode. The torque steer is wild.
10-15-2007, 04:37 PM
#56
Senior Member
Certified GM nut

Join Date: Jul 2004
Location: New York City
Posts: 1,912
Likes: 0
Received 0 Likes
on
0 Posts
I love the dampening material idea. I wonder if it would benefit the 00+ guys. Also glad the car Zilla is running well. I hadn't noticed that you got the bottomend fixed?
10-15-2007, 04:41 PM
#57
Junior Member
Posts like a Ricer Type-R
Thread Starter
Still got a hole in the piston, and have the timing retarded with a 2.5" pulley (safe with the 1.8'* and ported heads).
Flat out kills the way it was running at WCBF. Hadn't had enough time to 'adjust' before it ran at the track.
Paul'* not kidding. Torque-steer is a nasty beast. He almost sideswiped a truck when he floored it from 20mph.
Flat out kills the way it was running at WCBF. Hadn't had enough time to 'adjust' before it ran at the track.
Paul'* not kidding. Torque-steer is a nasty beast. He almost sideswiped a truck when he floored it from 20mph.
10-15-2007, 06:21 PM
#58
Junior Member
Join Date: Jun 2002
Posts: 0
Likes: 0
Received 0 Likes
on
0 Posts
Hurry up and get home from work Bill.
I sitting here just itching to get modding again.
I'm alread 3 beer and a couple tequilla ahead of you. :P
Bill does not have a hole in his piston. He'* only missing about 90 degrees of the rim off one piston. That is causing a loss of compression in that cylinder. I can only imagine how much more power if the Zilla were running on 6 cylinders instead of 5.
I sitting here just itching to get modding again.
I'm alread 3 beer and a couple tequilla ahead of you. :P
Bill does not have a hole in his piston. He'* only missing about 90 degrees of the rim off one piston.
11-03-2007, 06:35 PM
#59
Junior Member
Posts like a Ricer Type-R
Thread Starter
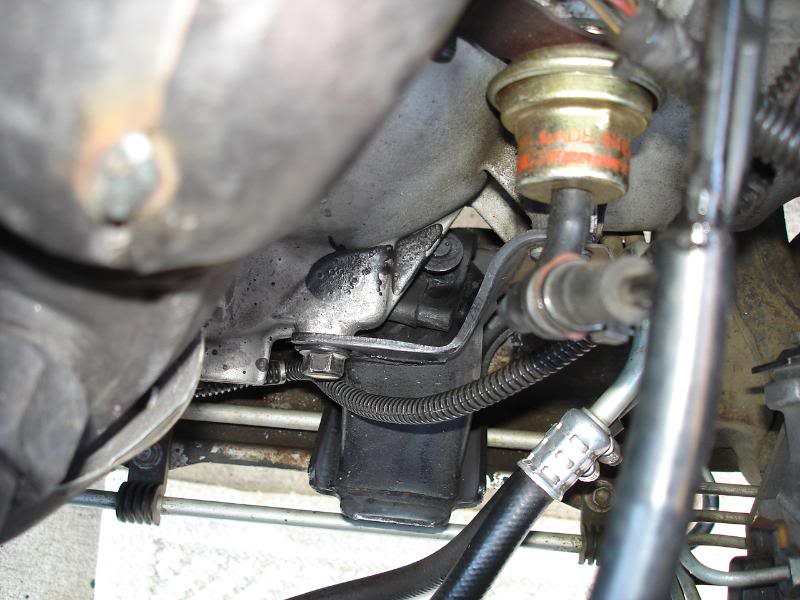
(remember, this is for 92-99, the front trans mount)
Update, several days later. Round 3 is done.
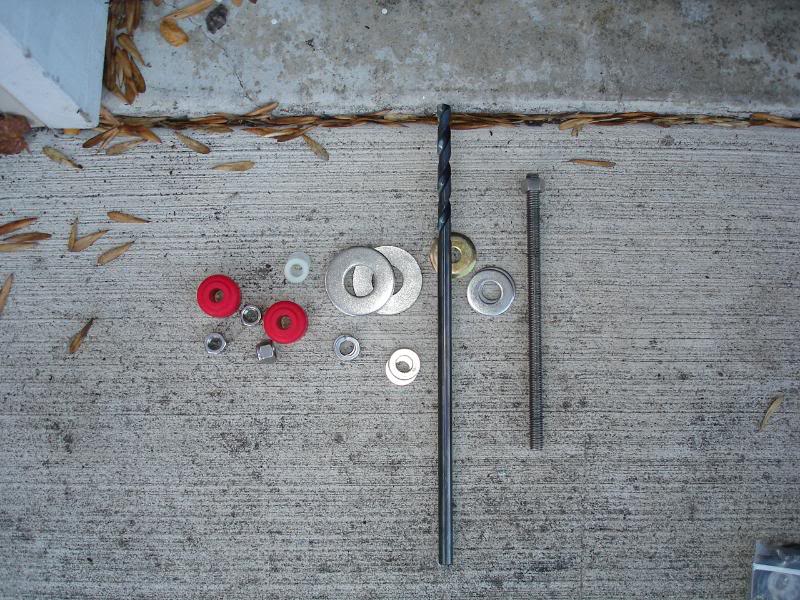
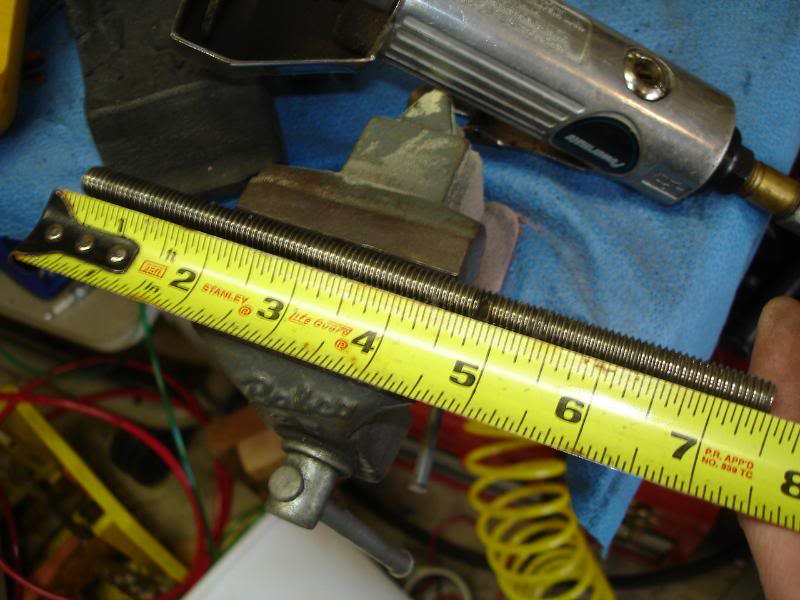
The ammo. Leftover endlink bushing from the 'rear' universal kit, endlink washer, allthread, lockwashers, standard nuts, and nylock nuts:
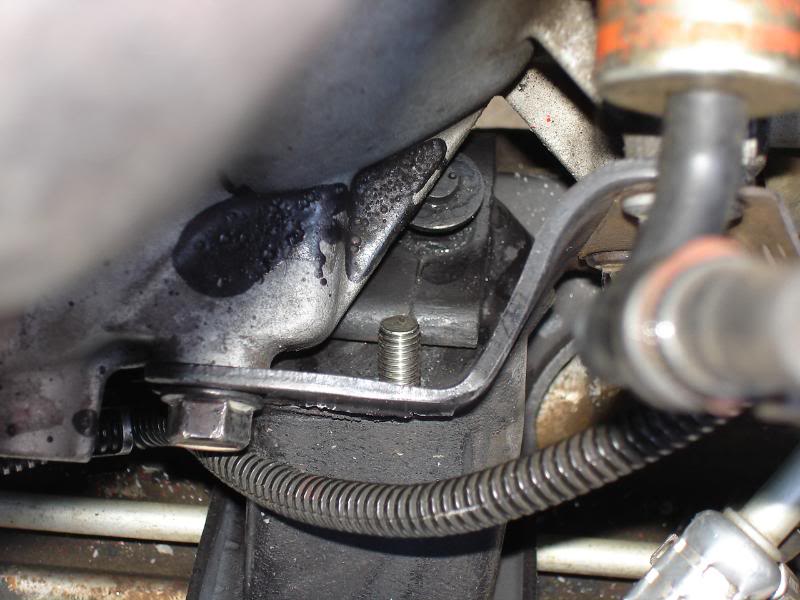
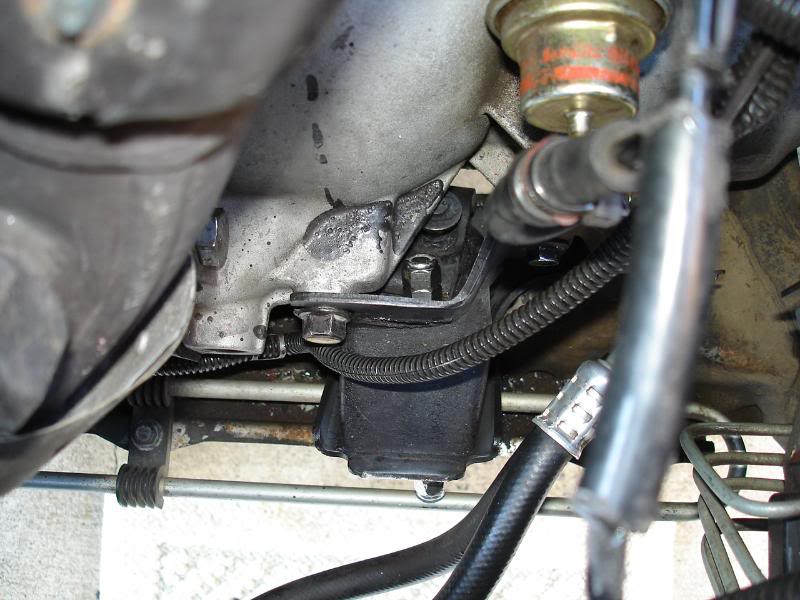
This is where it'* going. We're looking down from the top of the radiator. Rear of the car to the top of the pic, front of the car to the bottom of the pic. That black trans mount is going to get drilled from bottom to top:
Remember that long drill bit in the first pic? It cost me $11. 3/8" diameter. I drilled through (be VERY careful doing this, you have to hit a very small pocket between the mount and trans, and if you miss, you won't be able to get the back side nuts on). I had to use my cordless drill to 'screw' the threaded rod in and out because of the grip of the rubber in the mount:
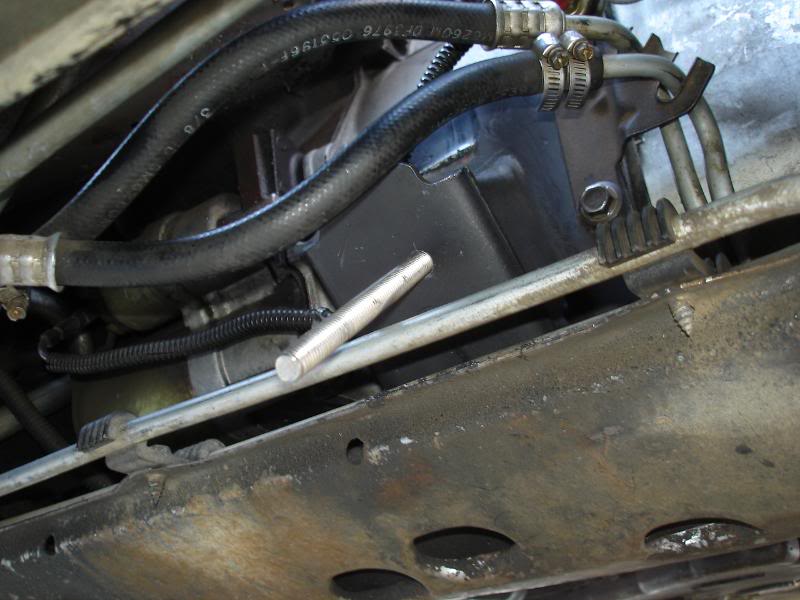
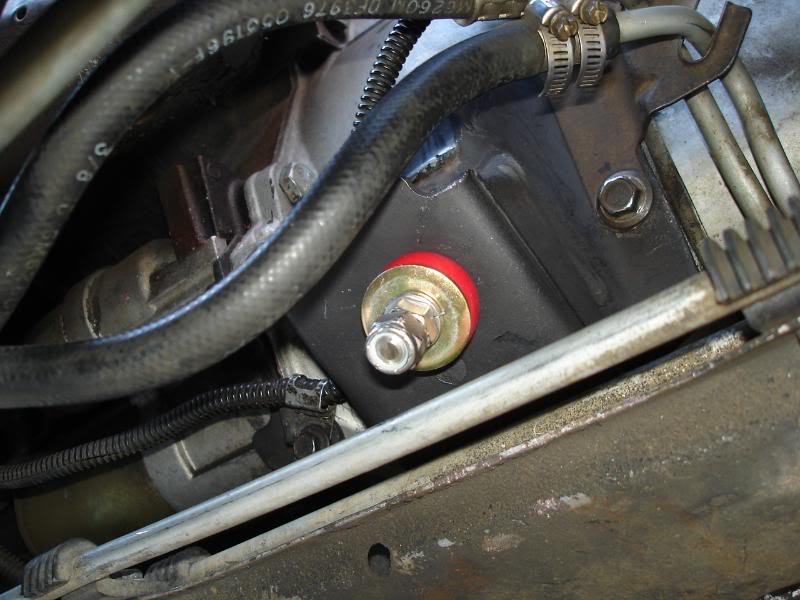
Here'* the other end. I hit the zone. It'* still going to be tough to get the washers and nuts on:
Closer view:
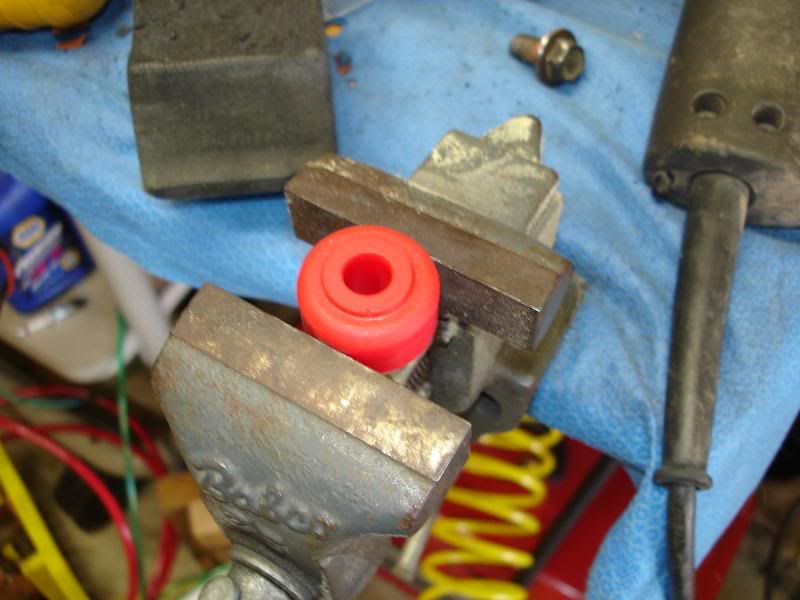
Now let'* modify that polyurethane bushing. We're taking the little ring off the top so that it sits flush on the bottom face of the mount. the top in this pic (as viewed) will be against the mount:
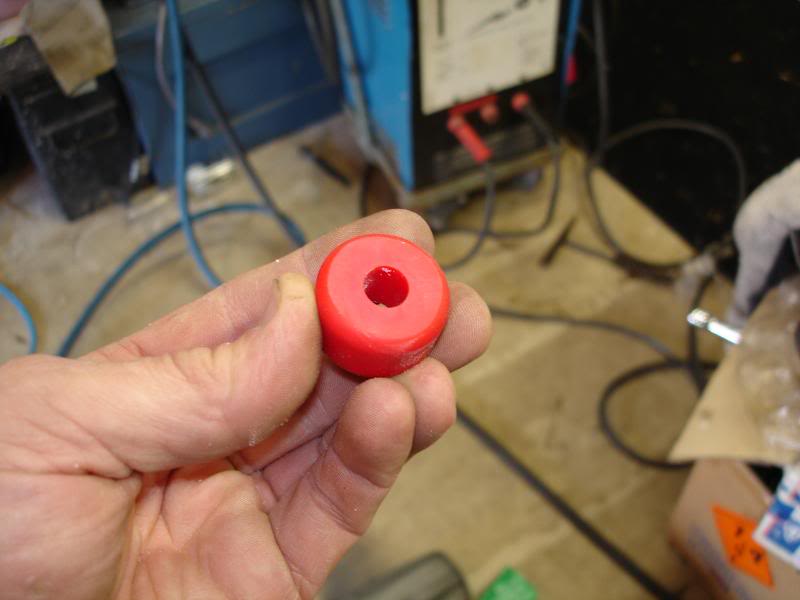
Here'* the bushing with the 'crown' shaved off:
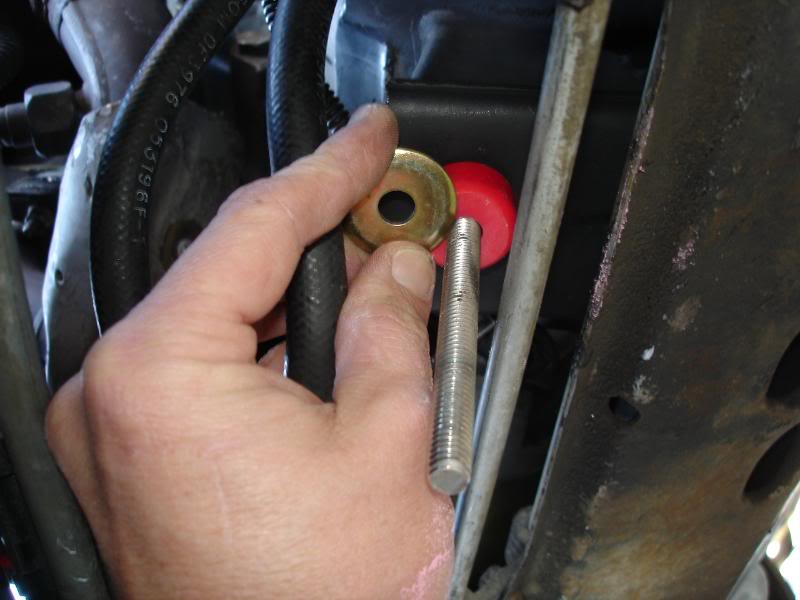
Fitting the length to cut the rod. Make sure you leave enough on the other end for a washer, lock washer, and 2 nuts:
Cut to length:
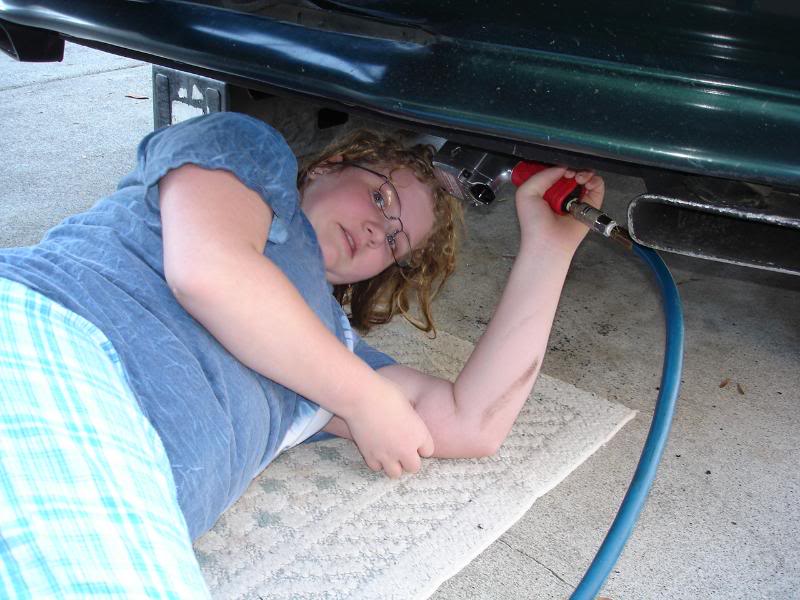
Daddy got a head start, and had to recruit Katie, still in PJ'*, for the extra set of hands. She handles the impact wrench like a pro:
Flat washer, lock washer, standard nut, and Nylock nut on the back side:
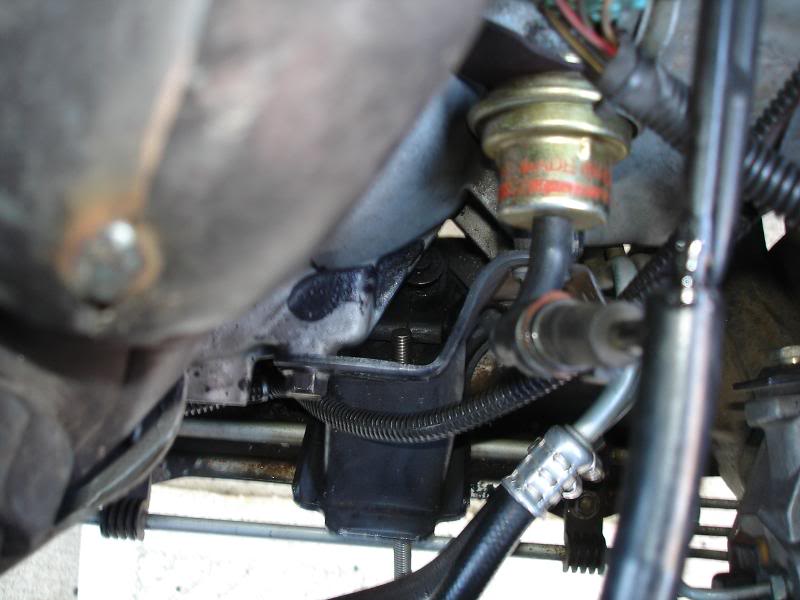
Endlink polyurethane bushing, endlink washer, lockwasher, standard nut, and nylock nut on the front (bottom) side:
Tightened to compression+. So it'* just starting to swell.
This mount should naturally damp vibration almost as well as stock. It will use the OEM rubber wedge for compression (letting off the gas), and the poly bushing for extension or tension (rolling on the loud pedal).
Road test coming soon.
Update, several days later. Round 3 is done.
The ammo. Leftover endlink bushing from the 'rear' universal kit, endlink washer, allthread, lockwashers, standard nuts, and nylock nuts:
This is where it'* going. We're looking down from the top of the radiator. Rear of the car to the top of the pic, front of the car to the bottom of the pic. That black trans mount is going to get drilled from bottom to top:
Remember that long drill bit in the first pic? It cost me $11. 3/8" diameter. I drilled through (be VERY careful doing this, you have to hit a very small pocket between the mount and trans, and if you miss, you won't be able to get the back side nuts on). I had to use my cordless drill to 'screw' the threaded rod in and out because of the grip of the rubber in the mount:
Here'* the other end. I hit the zone. It'* still going to be tough to get the washers and nuts on:
Closer view:
Now let'* modify that polyurethane bushing. We're taking the little ring off the top so that it sits flush on the bottom face of the mount. the top in this pic (as viewed) will be against the mount:
Here'* the bushing with the 'crown' shaved off:
Fitting the length to cut the rod. Make sure you leave enough on the other end for a washer, lock washer, and 2 nuts:
Cut to length:
Daddy got a head start, and had to recruit Katie, still in PJ'*, for the extra set of hands. She handles the impact wrench like a pro:
Flat washer, lock washer, standard nut, and Nylock nut on the back side:
Endlink polyurethane bushing, endlink washer, lockwasher, standard nut, and nylock nut on the front (bottom) side:
Tightened to compression+. So it'* just starting to swell.
This mount should naturally damp vibration almost as well as stock. It will use the OEM rubber wedge for compression (letting off the gas), and the poly bushing for extension or tension (rolling on the loud pedal).
Road test coming soon.