Making a cold air box
 04-02-2009, 07:53 PM
#1
Retired Senior Admin


Expert Gearhead
Thread Starter
Join Date: May 2006
Location: Sheboygan Wisconsin
Posts: 29,661
Likes: 0
Received 29 Likes
on
25 Posts


There is no set way to make a cold box. This is simply an example. You can lay your PCM on it'* side, or leave it where it is. Each year will have differences. Move what you can and put your filter where you want it. Making a custom box will save you a lot of money. Again, this is only a example, you will need to make adjustments.
Here is the area I cleared for the air box. Most of this came from the removal of the stock air box.

Use some cardboard to make a template, then transfer that to 1/8" Plexiglas. Start with the bottom.

Then move on to the side. Watch for clearance of wires, hoses, and hood release. This shows the cone filter placement.

Use angle braces and small bolts to hold each joint in place. Once this part is all aligned you can move on.
Now make a template for the back portion that the filter will pass threw. make sure you get a tight fit here.

Here the box has been removed from the car to make working easier. I added the last small piece to finish the outside of the box. I also used a little thread lock on the bolts. I made sure all joints are lined up right and then tightened all bolts.
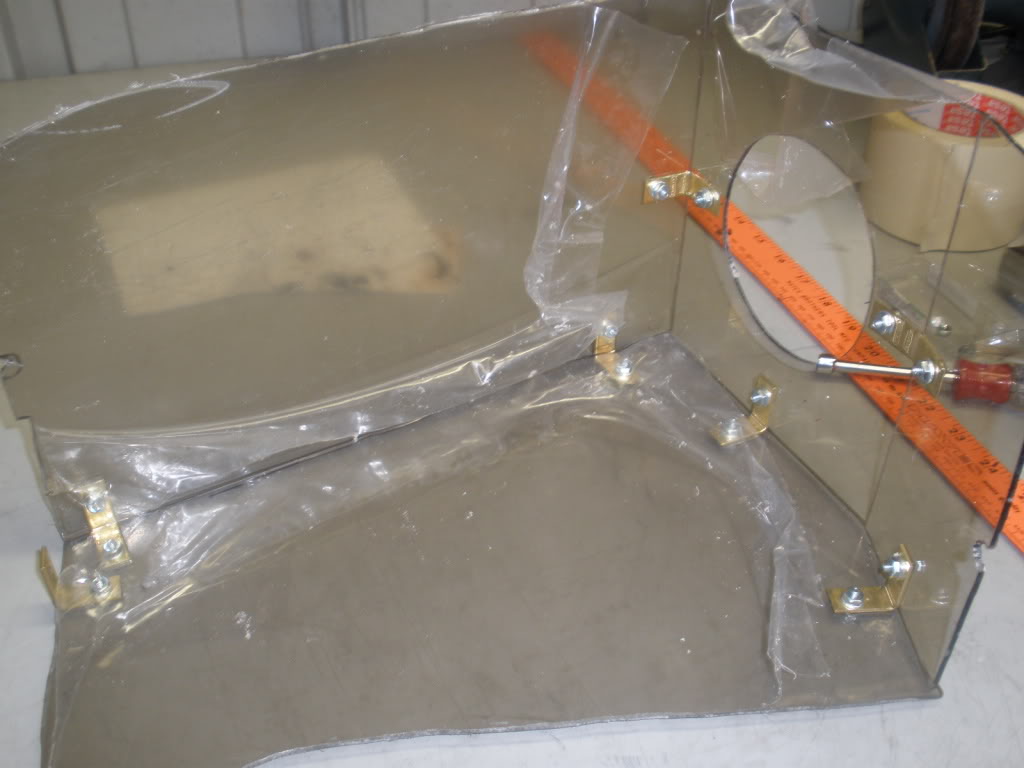
I then removed the protective masking from the Plexiglas and placed the box in place. I then used a angle brace to mount it to the body of the car.
Check all alignments so your work looks good and fits properly.

Now make a template for the lid. Do a good job here, this will be what everyone sees. It will also be what holds everything rigid.


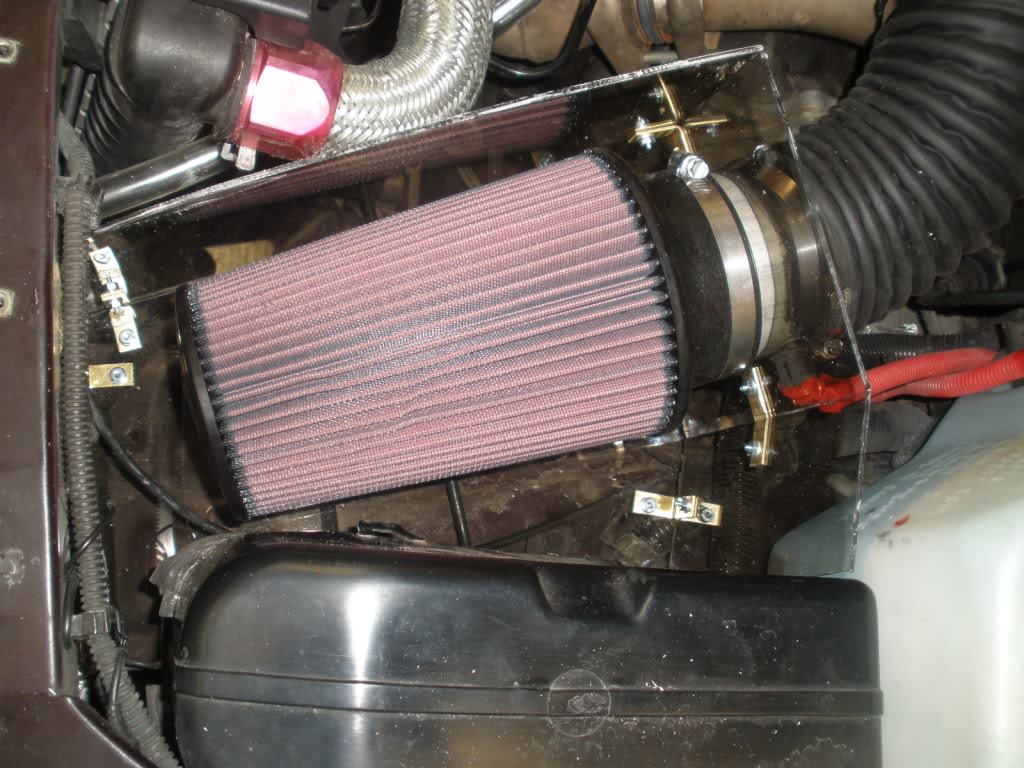
This MOD will run you under $40 or $50 not including the filter. I used a dremal with a cut off wheel to cut the Plexiglas, and a sanding drum to clean up the cuts. This was a few hours of easy work.
Gives a nice clean look to the engine bay.

Here is the area I cleared for the air box. Most of this came from the removal of the stock air box.
Use some cardboard to make a template, then transfer that to 1/8" Plexiglas. Start with the bottom.
Then move on to the side. Watch for clearance of wires, hoses, and hood release. This shows the cone filter placement.
Use angle braces and small bolts to hold each joint in place. Once this part is all aligned you can move on.
Now make a template for the back portion that the filter will pass threw. make sure you get a tight fit here.
Here the box has been removed from the car to make working easier. I added the last small piece to finish the outside of the box. I also used a little thread lock on the bolts. I made sure all joints are lined up right and then tightened all bolts.
I then removed the protective masking from the Plexiglas and placed the box in place. I then used a angle brace to mount it to the body of the car.
Check all alignments so your work looks good and fits properly.
Now make a template for the lid. Do a good job here, this will be what everyone sees. It will also be what holds everything rigid.
This MOD will run you under $40 or $50 not including the filter. I used a dremal with a cut off wheel to cut the Plexiglas, and a sanding drum to clean up the cuts. This was a few hours of easy work.
Gives a nice clean look to the engine bay.
 03-09-2012, 12:37 PM
#2
Junior Member
Posts like a Ricer Type-R

Join Date: Mar 2012
Posts: 11
Likes: 0
Received 0 Likes
on
0 Posts
I Have been searching for a cold air box for my SSEI. Doesn't anyone make these, or do you have to make a homemade one like what you did here?
Thanks for your response.
Thanks for your response.
03-09-2012, 02:21 PM
#3
Retired Senior Admin
Expert Gearhead
Thread Starter
Join Date: May 2006
Location: Sheboygan Wisconsin
Posts: 29,661
Likes: 0
Received 29 Likes
on
25 Posts
They make them for the GP, not sure if they fit. You can also look at dropping a hose threw the hole and put the filter in the fender well.
03-09-2012, 09:49 PM
#5
BANNED
True Car Nut


 [/IMG]
03-09-2012, 09:59 PM
[/IMG]
03-09-2012, 09:59 PM
#6
Retired Senior Admin
Expert Gearhead
Thread Starter
Join Date: May 2006
Location: Sheboygan Wisconsin
Posts: 29,661
Likes: 0
Received 29 Likes
on
25 Posts
I have mine in the fender, and I'm sucking a lot of air in mine. Besides that area the filter goes is closed off from the wheel well.

Thread
Thread Starter
Forum
Replies
Last Post
TaylorD
Performance, Brainstorming & Tuning
7
07-11-2004 01:10 PM
jachin
Performance, Brainstorming & Tuning
24
03-07-2004 12:20 PM