
Hood insulator revisited......again.
 01-13-2008, 09:47 PM
#1
Junior Member
Posts like a Ricer Type-R
Thread Starter

The old versions (previous on page 1, and older on page 2):
http://www.bonnevilleclub.com/forum/...ic.php?t=44080
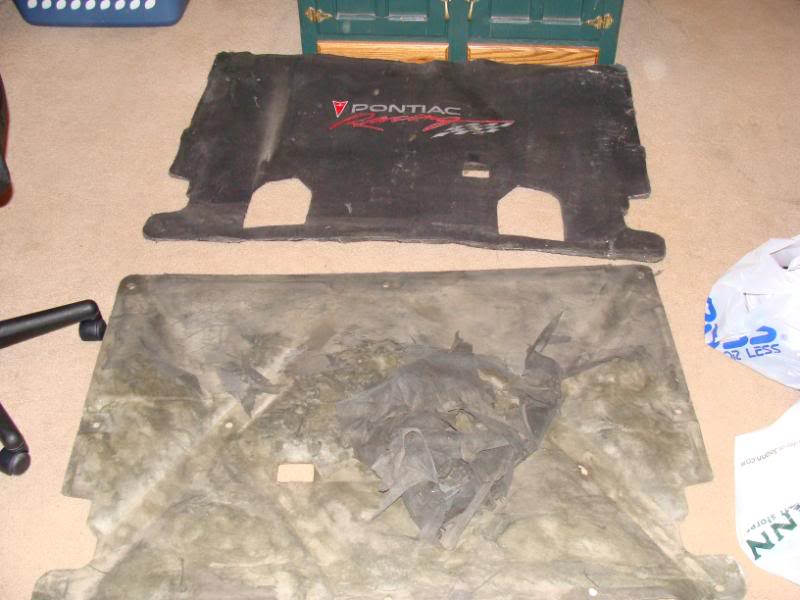
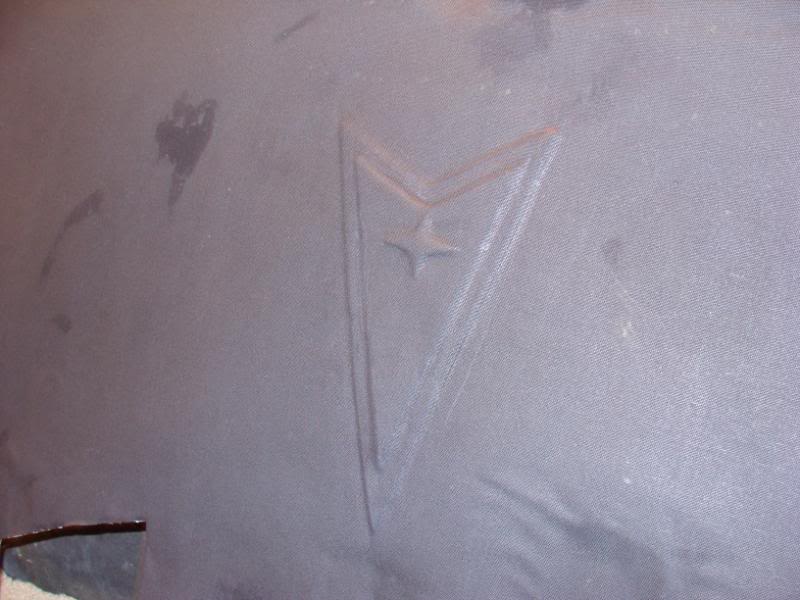
Thought I'd try something different this time, but before cosmetics, I have to consider mechanical strength. The vent cutouts remove alot of support and make the insulator too flexible. This particular victim is Red Deer'* old one that SSEiMatt93 brought down here under the hood of Damien last year for me.
Trust me, the old insulator looked good before a year of storage. Butt the back side of Matt'* was losing the cheescloth, so it'* time to re-cover it in a waterproof rip-stop nylon, but first we have to cut out for the vents:


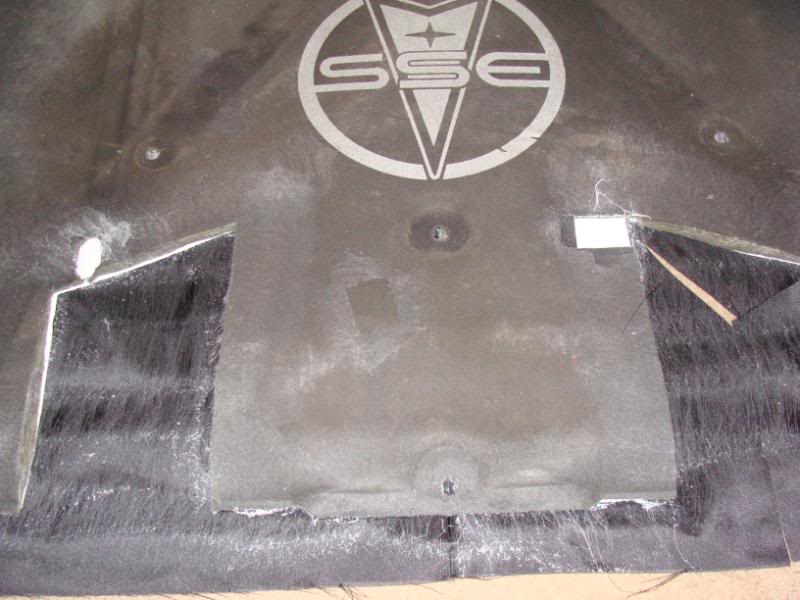
Time to reinforce the vent area now. This is very strong 1/8" styrene sheeting from the hobby store, laminated in with headliner adhesive. It adds just the right amount of rigidity to the cuts:

Same stuff to fill in the underhood light hole and the rip in the insulator:
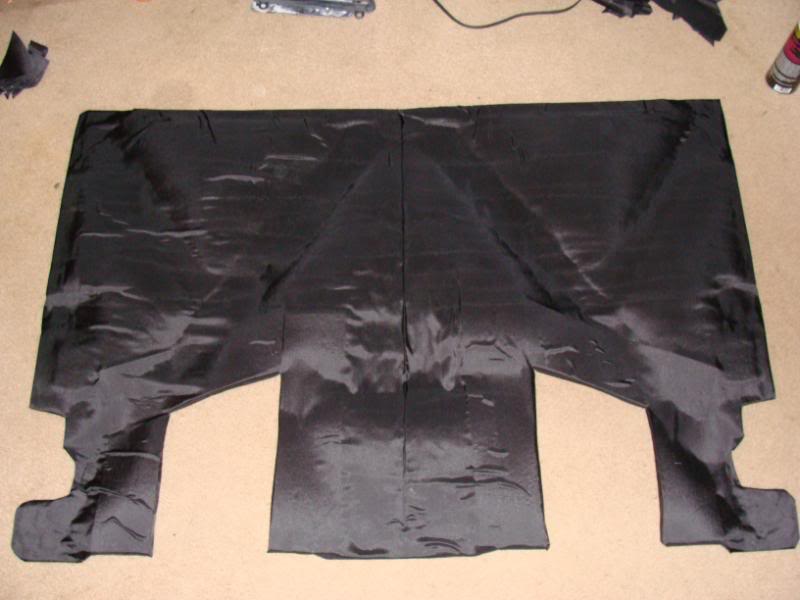
Headliner adhesive applied to the back (hood side) and the nylon, then pressed, cut, and wrapped around:

This will be in contact with the underside of my hood:
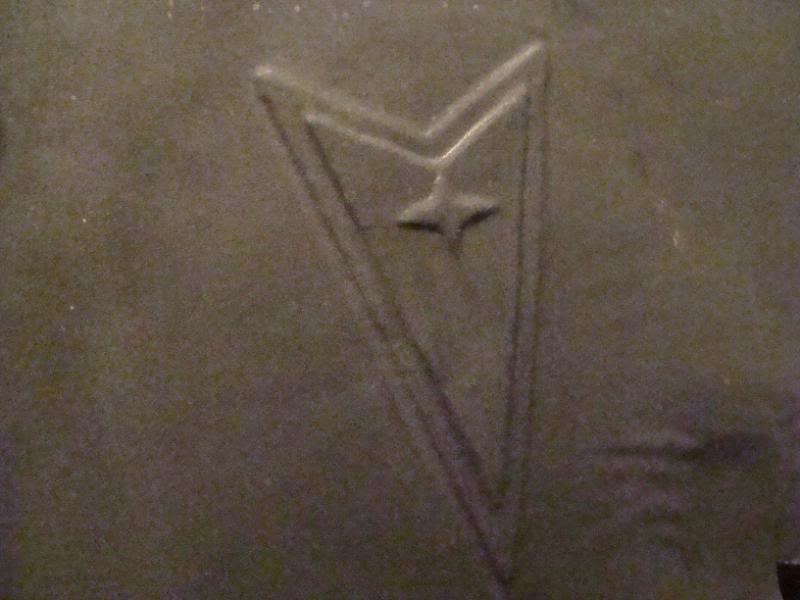
Now let'* get creative with that styrene:

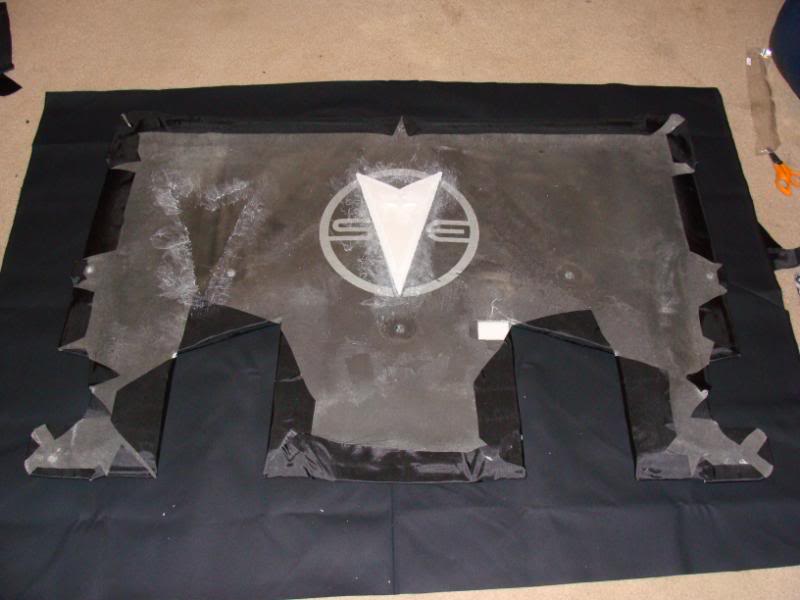
Now the canvas duck-cloth (visible side) has adhesive applied, as does that side of the hood insulator. This is right after placing them together, before flipping it and 'pressing in' the contours:

After initial trimming and before punching the retainer holes. Some more smoothing tomorrow after this dries will go a long way (ignore the water on it):

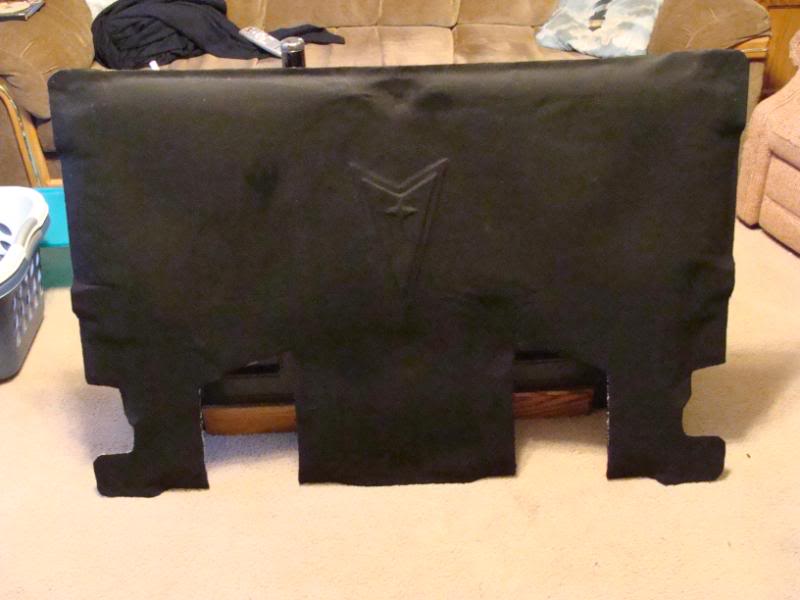
Not bad for a couple hours of work. But I had experience from doing this twice before.
http://www.bonnevilleclub.com/forum/...ic.php?t=44080
Thought I'd try something different this time, but before cosmetics, I have to consider mechanical strength. The vent cutouts remove alot of support and make the insulator too flexible. This particular victim is Red Deer'* old one that SSEiMatt93 brought down here under the hood of Damien last year for me.
Trust me, the old insulator looked good before a year of storage. Butt the back side of Matt'* was losing the cheescloth, so it'* time to re-cover it in a waterproof rip-stop nylon, but first we have to cut out for the vents:
Time to reinforce the vent area now. This is very strong 1/8" styrene sheeting from the hobby store, laminated in with headliner adhesive. It adds just the right amount of rigidity to the cuts:
Same stuff to fill in the underhood light hole and the rip in the insulator:
Headliner adhesive applied to the back (hood side) and the nylon, then pressed, cut, and wrapped around:
This will be in contact with the underside of my hood:
Now let'* get creative with that styrene:
Now the canvas duck-cloth (visible side) has adhesive applied, as does that side of the hood insulator. This is right after placing them together, before flipping it and 'pressing in' the contours:
After initial trimming and before punching the retainer holes. Some more smoothing tomorrow after this dries will go a long way (ignore the water on it):
Not bad for a couple hours of work. But I had experience from doing this twice before.


 01-14-2008, 04:30 AM
#4
Senior Member
True Car Nut
Join Date: Sep 2006
Location: Indianapolis, IN
Posts: 4,606
Likes: 0
Received 0 Likes
on
0 Posts

Originally Posted by 2000SilverBullet
I like the 3D arrowhead theme.
Looks good Bill.
Are you going to add some colour :?:
Looks good Bill.
Are you going to add some colour :?:
01-14-2008, 06:38 AM
#5
Junior Member
Posts like a Ricer Type-R
Thread Starter
I'm debating color. I'll put it on the car first and see how it looks. But I'll have to make that decision before I waterproof it further. It doesn't really need it, but it'* added insurance.
I also need to reinforce the edges to prevent peel. I had a slight amount of that on the last one.
I also need to reinforce the edges to prevent peel. I had a slight amount of that on the last one.
01-14-2008, 10:01 PM
#6
Senior Member
True Car Nut

Join Date: May 2003
Location: Lethbridge, Alberta, _______Canada._______ West Coast Bonneville Fest ___05,06,07 Survivor___
Posts: 8,135
Likes: 0
Received 1 Like
on
1 Post
Its about time!
Yeah, I had to remove my stock cover to carry that one down to oregon installed in Damien
Yeah, I had to remove my stock cover to carry that one down to oregon installed in Damien

Thread
Thread Starter
Forum
Replies
Last Post
willwren
Detailing & Appearance
41
12-03-2005 01:22 AM
SSEimatt93
General GM Chat
16
10-29-2003 05:07 PM