my custom build tons of pics on the way


 05-08-2010, 04:25 PM
#52
Senior Member
Posts like a Turbo
Thread Starter
Join Date: Dec 2006
Location: Cincinnati, Ohio
Posts: 484
Likes: 0
Received 0 Likes
on
0 Posts

I have been super slammed over the past two months however, I have once again changed up a few details of my car. I got my custom door panels wrapped and am gonna be running two sets of 6.5 components in the front and 6x9'* in the rear. German Maestro Status line. They should sound great! I think I am gonna take a sunday and just do it all in a day and get it over with. after all, all I really have left to do is finish off my back wall and mount my amps in the rack and put in the door panels. I will Post a ton of pics again soon. Lots of fiberglassing!
06-10-2010, 12:01 PM
#53
Senior Member
Posts like a Turbo
Thread Starter
Join Date: Dec 2006
Location: Cincinnati, Ohio
Posts: 484
Likes: 0
Received 0 Likes
on
0 Posts
okay so i know its been a while since i posted but life has drawn me in several directions that have kept me very busy but, that doesnt mean I havent had time to play in the garage.... You all may recall that I stated that I have a major case of car audio a.d.d well to further prove that point, here is the new list of my audio set up.... lol
Head unit- Clarion vx400
custom front door panels-german maestro status line SV6509 6.5 components
rear deck-german maestro status line SV6509 components
subwoofers- (2) planet audio big bang 12'*.... lol! I told you!
Anyhoo here is how it started:
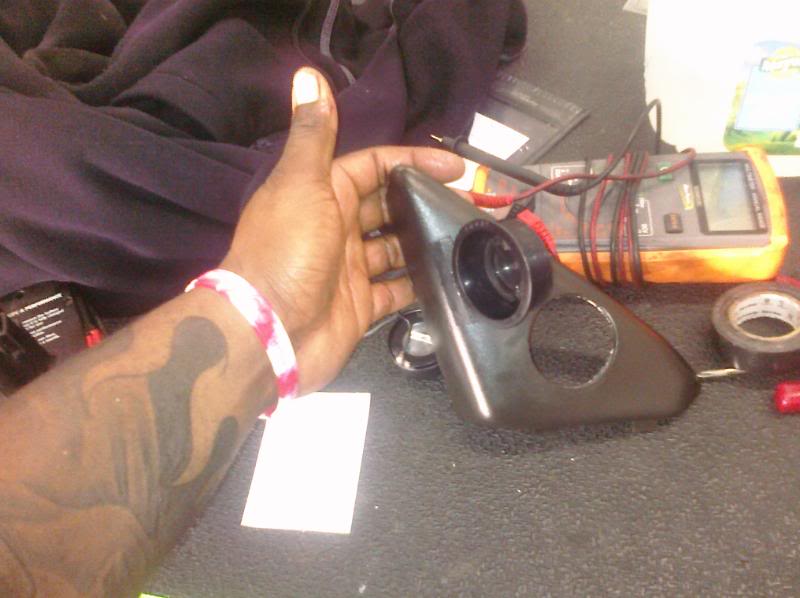
I decided that I was tired of the poor imaging of the factory tweeter in the a pillar

So i decided to do custom pods to fire the tweeters NOT directly at the ear but past it to widen the sound stage. the first thing I did was mount the tweeter cup on the factory panel at an angle. I just mounted a few small strips of abs plastic under the front lip and hot glued it all into place

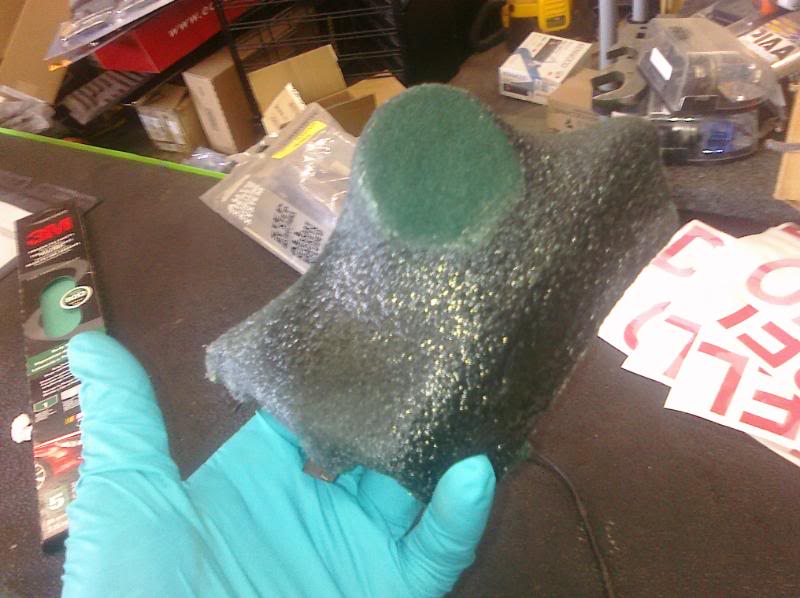
then I called out my old friend the green fleece and wrapped the cups and panels together

then I dowsed them in fiberglass

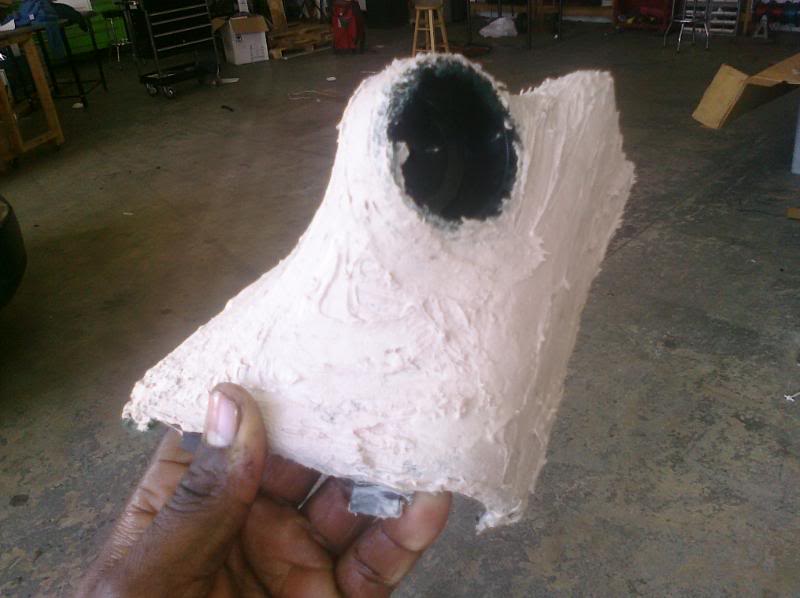
I always try to keep the hole for the speaker free from fiberglass just because it is easier to cut with a definite boundary of where the glass ends and the free fleece begins
then I put on a decent layer of bondo
then I sanded it using a round block for the curves and a flat block for long surfaces. I started with 60 grit

then sanded some more

and more

I repeated the process with 80 grit and then 120 grit and then wet sanded it with 400 grit
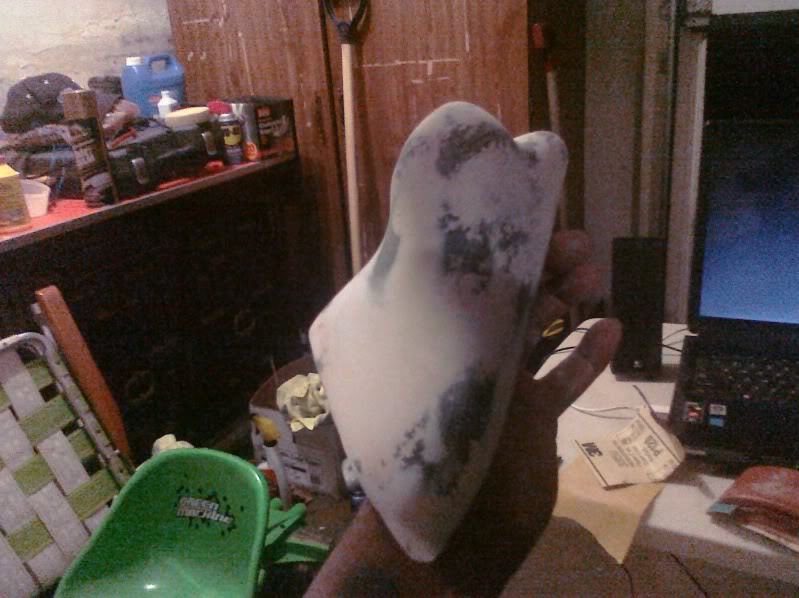
I hit both the pods with one of mans greatest creations... high build primer. It fills in pin holes like a champ!

the good thing about flexible surface primer is the fact that it will show you flaws and you can sand them down where needed. Which I did a ton... lol! Finally got them right though!

then I sprayed them with gloss black paint. about 6 coats in all

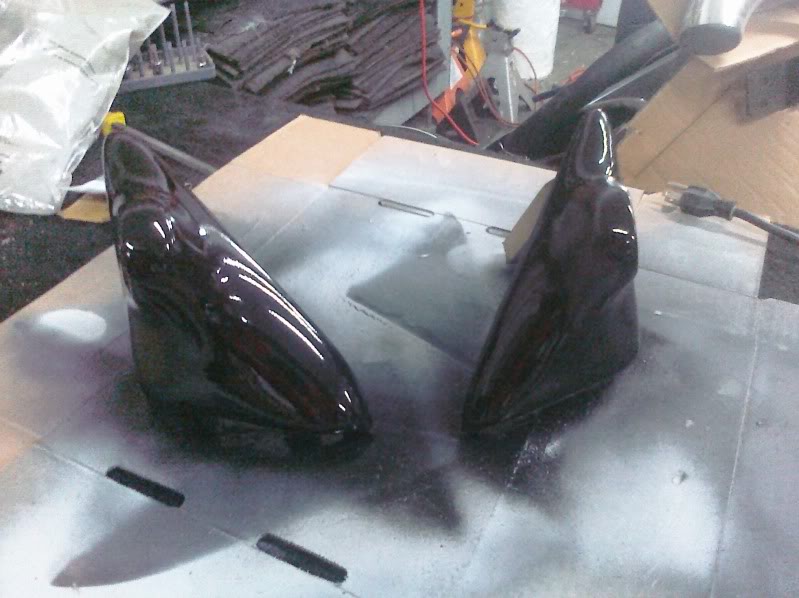


sexy kinda..... lol! more pics to come so subscribe to my thread if you havent yet. feel free to ask for any pointers. remember this thread is a tutorial not a showcase...
Head unit- Clarion vx400
custom front door panels-german maestro status line SV6509 6.5 components
rear deck-german maestro status line SV6509 components
subwoofers- (2) planet audio big bang 12'*.... lol! I told you!
Anyhoo here is how it started:
I decided that I was tired of the poor imaging of the factory tweeter in the a pillar
So i decided to do custom pods to fire the tweeters NOT directly at the ear but past it to widen the sound stage. the first thing I did was mount the tweeter cup on the factory panel at an angle. I just mounted a few small strips of abs plastic under the front lip and hot glued it all into place
then I called out my old friend the green fleece and wrapped the cups and panels together
then I dowsed them in fiberglass
I always try to keep the hole for the speaker free from fiberglass just because it is easier to cut with a definite boundary of where the glass ends and the free fleece begins
then I put on a decent layer of bondo
then I sanded it using a round block for the curves and a flat block for long surfaces. I started with 60 grit
then sanded some more
and more
I repeated the process with 80 grit and then 120 grit and then wet sanded it with 400 grit
I hit both the pods with one of mans greatest creations... high build primer. It fills in pin holes like a champ!
the good thing about flexible surface primer is the fact that it will show you flaws and you can sand them down where needed. Which I did a ton... lol! Finally got them right though!
then I sprayed them with gloss black paint. about 6 coats in all
sexy kinda..... lol! more pics to come so subscribe to my thread if you havent yet. feel free to ask for any pointers. remember this thread is a tutorial not a showcase...

 06-10-2010, 12:09 PM
#55
Senior Member
Posts like a Turbo
Join Date: May 2009
Location: Hibbing MN
Posts: 327
Likes: 0
Received 0 Likes
on
0 Posts
looks real good mang. ill have to get me some of that high build for my next finish cuz i used the cheaper stuff that dont fill holes for nothing lol sanded forever and had to mix up lil amounts of some filler=resin mix lol that wasnt fun to say the least lol. did you get any play on the sub setup atleast? the single?
06-10-2010, 12:12 PM
#56
Senior Member
Posts like a Turbo
Thread Starter
Join Date: Dec 2006
Location: Cincinnati, Ohio
Posts: 484
Likes: 0
Received 0 Likes
on
0 Posts
dude that single 15 was hardcore! I was in the mid 140'* on music all day! I just decided to go to 12'* to get higher numbers and better sq. gonna switch back to a vent port design to get the box size I want. was even thinking about doin a transmission line enclosure
06-10-2010, 12:21 PM
#57
Senior Member
Posts like a Turbo
Join Date: May 2009
Location: Hibbing MN
Posts: 327
Likes: 0
Received 0 Likes
on
0 Posts
hahaaa yeah a Tline would be a beast of beuty for sure lol. good to hear ya beat on it atleast, i was thinking you just went and decided to change it up asap before that got play lol. guess thats more of something id do lol.